Adobe Premiere Pro – How to Adjust Video Speed
Understanding speed control (double speed) and video clip settings in Premiere Pro videos
How to use Premiere Pro double speed
Previously, we learned about cut editing and subtitle insertion, which are the basic methods for video work in Premiere Pro. Now it’s time to learn about the various effects of video. In this episode, we will learn the basics of how to adjust video speed.
1. Video clip settings
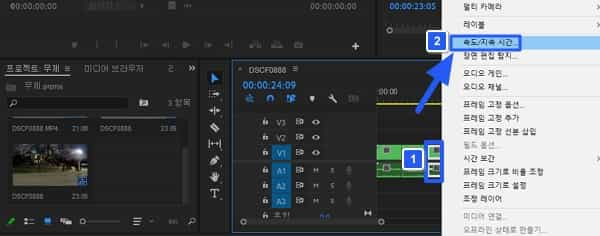
First, select the video clip whose speed you want to adjust and right-click.

2. Speed/Duration
Setting menus for various video clips will appear, as shown in the image. Choose a speed/duration. This allows you to adjust the speed of specific video clips.

3. Speed settings
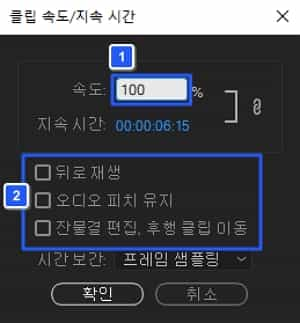
You can make various settings for video clip speed and duration. The default speed is 100 (1x speed). You can set the speed in detail to 125 (1.25x speed), 200 (2x speed), etc. In addition, various settings such as playing backwards and moving clips are possible.

4. Check the set video clip
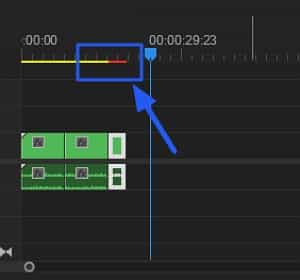
This shows separate settings for video clips in the timeline. As shown in the image above, you can see which additional settings have been set through the small red lines.

Summary
- You can adjust the speed of each video clip.
- Speed adjustments in video clips can be checked through the timeline.