Adobe Premiere Pro – How to Color Correction
How to complete editing and correct the overall color of the video
How to correct video color
Previously, I learned how to simply edit videos through Premiere Pro. Now that most of the editing work has been completed, it’s time to look at the colors for the video. In this episode, we will learn about Premiere Pro color correction methods.
1. Select the image to color correct
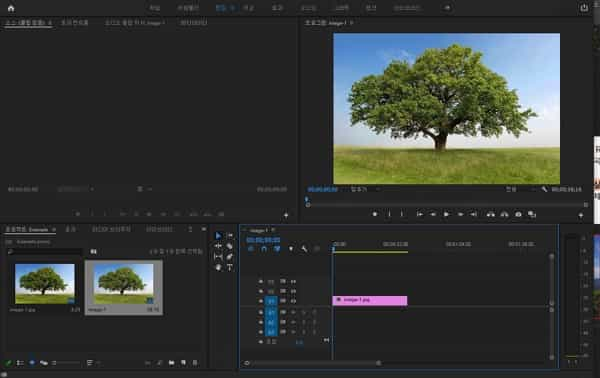
To make it easier to understand the changes in color correction, we will perform corrections using a simple photo of about 10 seconds in length. This is an example photo.

2. Select video effect
Color correction can be done in Effects – Video Effects. As an example, we will proceed with color correction for the luma curve in Not Used. Since each color correction characteristic is different, it is recommended to apply it separately and then proceed with color correction.

3. Insert color correction effect into video
Likewise, you can insert color correction effects by dragging and dropping. For video consistency, we recommend adding only one to two color correction effects.

4. Color correction with effects controls
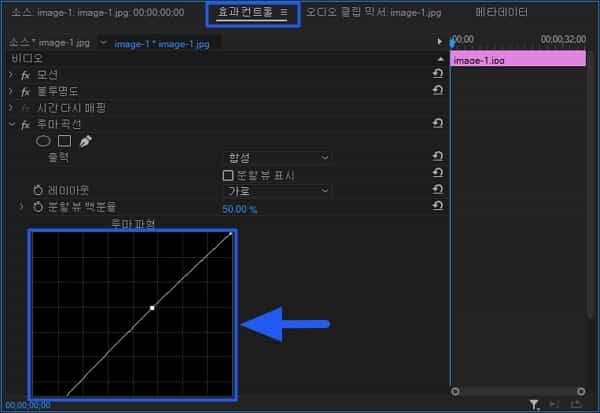
You can set up detailed corrections in the Source Monitor panel – Effect Controls. Luma curve correction can be done by moving the line as shown in the image above.

5. Check the calibrated color
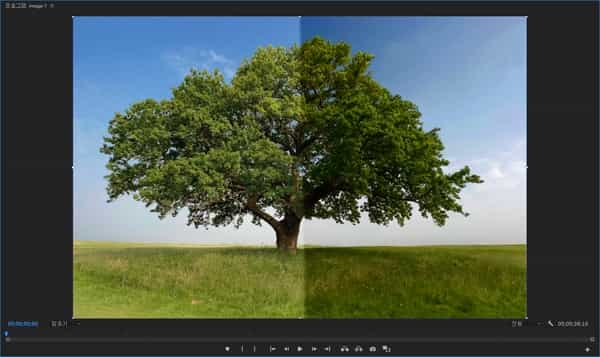
To facilitate understanding of color correction, half of the image was masked. As shown above, it can be divided into before/after color correction.

6. Finishing work
Once you find the color you want, you can apply it to all parts.

Summary
- You can correct the color of the video using drag & drop or effect controls.
- Color correction can be divided into before/after and compared.