Adobe Premiere Pro – How to Cut Edit
Understanding the basics of video editing through Premiere Pro and how to edit cuts
In the previous episode, we looked at the basic settings of Premiere Pro and how to load media. In this episode, we will learn how to apply it to actual videos along with a simple understanding of cut editing, which is the basis of all video editing.
1. Edit cut through the timeline
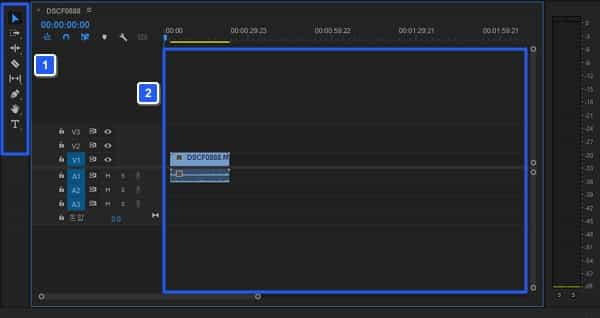
This is the basic interface of the Premiere Pro timeline. All cut edits can be started from the timeline.

1-1. Toolbar
This is a collection of tools that can perform various functions for cut editing and video editing. You can write here or use shortcut keys.
1-2. Timeline
You can easily edit and join videos and perform various tasks.
2. Video cutting

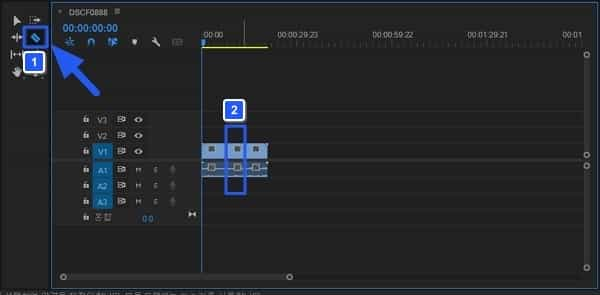
First, select the Crop tool. Once you select the length of the video you want, you can use the crop tool to cut only the desired portion of the video. The shortcut for the Crop tool is C. You can use shortcut keys to work faster.
3. Moving the cut video

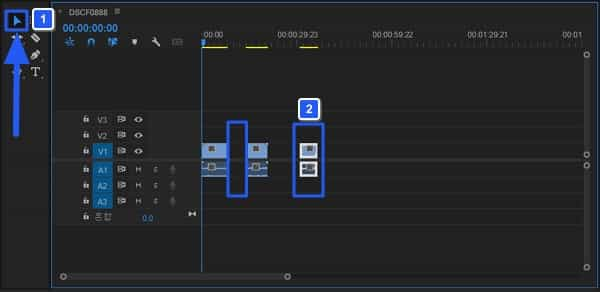
You can change the tool to the selection tool again and move the cropped video to the desired location. The shortcut for the selection tool is V. In this way, you can create the video you want in a stitched format. If you actually apply it, you can easily do cut editing with just C, V, and mouse movements.
Summary
- You can select various tools to edit video cuts.
- This can be easily done by dragging and dropping the mouse on the timeline.