Adobe Premiere Pro – How to Recover Panel
How to recover missing panels while using Premiere Pro
How to recover Premiere Pro panels
While using Premiere Pro, you may sometimes accidentally remove a panel and end up missing a panel. If you re-run the program each time, the panel will be restored, but re-running it every time it disappears is very inefficient. In this episode, we will learn how to easily restore a missing panel.
1. Panel classification
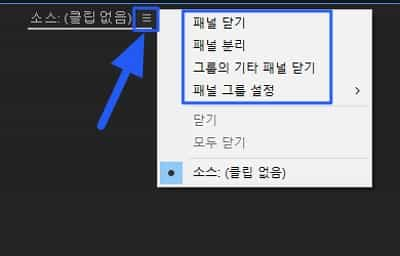
First, the panel classification method. Clicking on the three lines will give you various actions for the panel. The panel can be closed or detached.

2. Check for missing panels
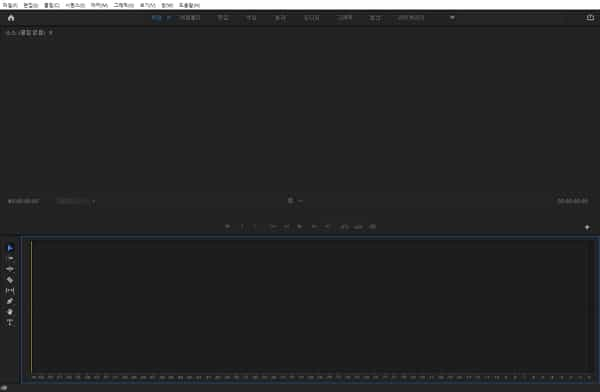
It looks like the panel is gone. It can be very monotonous and uncomfortable to work with. Now, let’s start repairing the panel in earnest.

3. Recover the desired panel
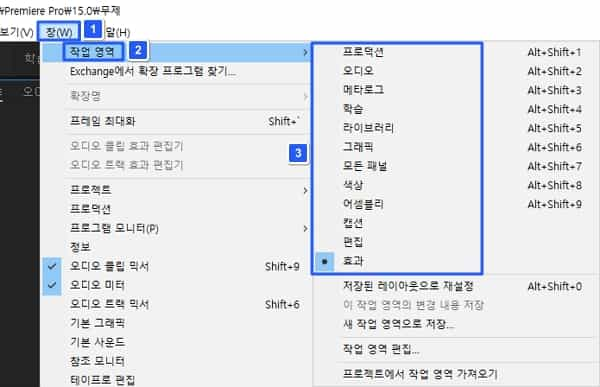
You can restore the type of panel you want in the Window-Workspace at the top right. Recovery is also possible with shortcut keys using “Alt+Shift+Number.” In this way, you can restore only the window you want to restore. Here’s how to recover all windows.

4. Reset saved layout
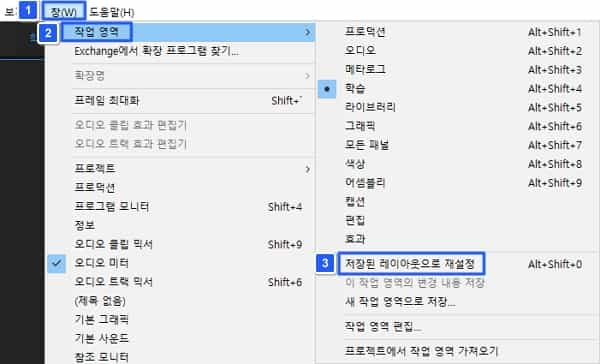
Likewise, go to Window > Workspace and click Reset to Saved Layout. This way you can restore your windows to the same saved layout wherever you go. If you are more experienced with Premiere Pro, you can load it anytime, anywhere with your own layout settings.

Summary
- The missing panel can be restored as desired. This is also possible using shortcut keys.
- By saving the layout, you can select and load the previous layout.