Adobe Premiere Pro – Subtitle Insert
Partial and detailed settings for subtitles inserted into videos
Add subtitles to Premiere Pro
After completing the basic settings of Premiere Pro and understanding basic cut editing, it is now time to cover video-related content. In this episode, we will learn about subtitles, which play a part in the completeness of a video.
1. Text tool
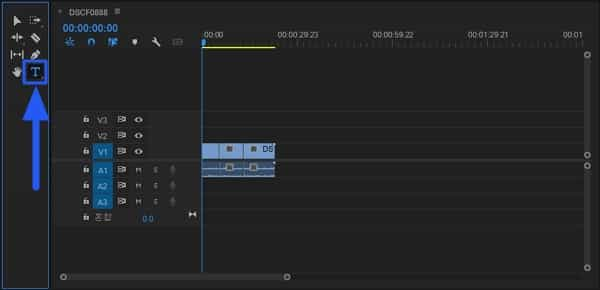
To add subtitles to a video, you first need a text tool. Select the T-shaped Type tool as shown in the image.

2. Insert video subtitles
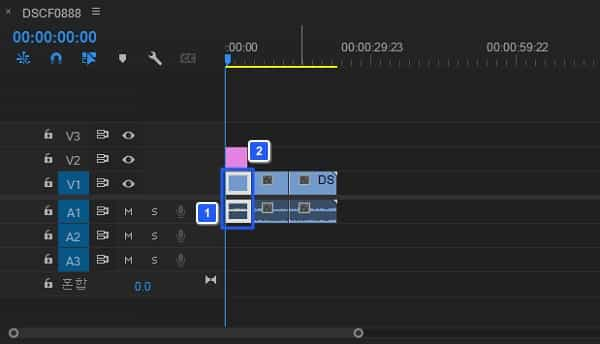
Select the desired part of the video and add subtitles. The shortcut key is Ctrl+T. The pink part can be increased or decreased.

3. Subtitle section settings
If you select subtitles, you can set various aspects such as the position of the subtitles and text size.
- Subtitle position setting: You can set the position of the subtitles and set the overall frame of the basic subtitles.
- Effect Control: Indicates the effect on the video. You can edit the content of the subtitles.
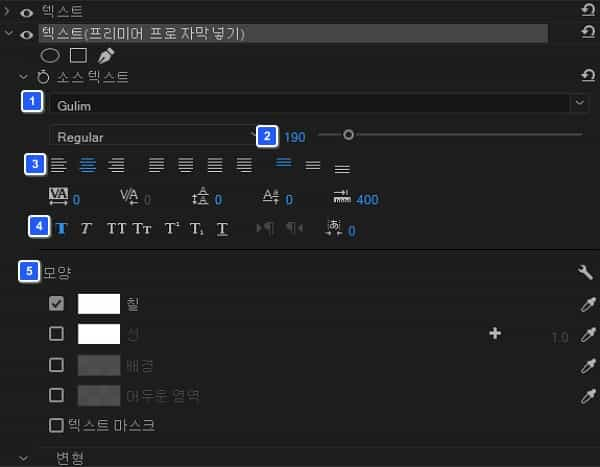
- Subtitle detailed settings: You can edit the subtitle content, font, and size. Please refer to the following for details.

4. Subtitle detailed settings
You can modify various settings for your text.
- Subtitle Font: You can change the font for subtitles.
- Subtitle bold: You can set the thickness of the subtitles displayed in the video.
- Subtitle thickness and additional effects: You can set subtitle case sensitivity, italics, etc.
- Subtitle position: You can edit the position of the subtitles.
- Subtitle shape: You can set the color, shape, and lines of the subtitles.

Summary
- You can insert subtitles into the desired part of the video.
- You can select the section where subtitles are displayed and set detailed settings.