BlueStacks VT Activation Guide
How to activate VT after entering BIOS while using BlueStacks
How to activate BlueStacks VT
When using BlueStacks, there are times when the frame rate suddenly drops or stuttering occurs. In this case, you can solve the problem by updating the graphics driver or using virtualization settings.
1. Check if virtualization can be set up
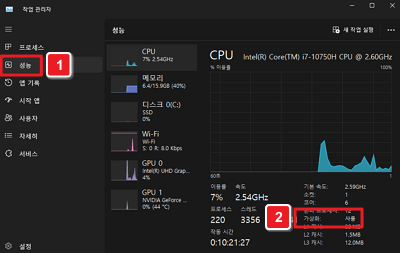
First, you need to check whether PC virtualization settings are possible. If you select Task Manager (Ctrl+Shift+Esc) – Performance – CPU, you can check whether virtualization is available as shown in the image.
2. Enter BIOS
If your PC is capable of virtualization, you can use virtualization settings by entering the BIOS. Enter the BIOS by referring to the BIOS entry shortcut key for each motherboard.
| BIOS entry shortcut key for each motherboard | |||||
| MSI | UEFI | ASUS | GIGABYTE | ||
| Del | |||||
| InsydeH20 | ASRock | ||||
| F2 | |||||
3. VT activation
This is the VT activation path for each motherboard. You can enable VT after entering the BIOS by referring to the motherboard you are using. You can easily find it with F3 – Motherboard Search.
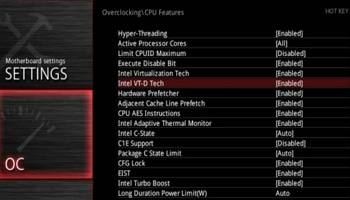
MSI VT Path
OC – Overclocking – CPU Features – Intel Virtualiation Technology
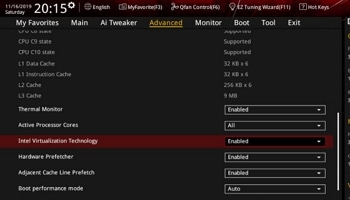
UEFI VT Path
Advanced Mode – Advanced – CPU Configration – Intel Virtualiation Technology
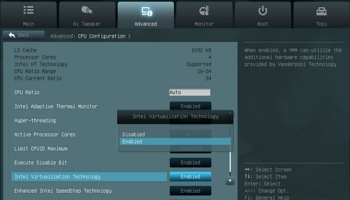
ASUS VT Path
Advanced Mode – Advanced – CPU Configration – Intel Virtualiation Technology
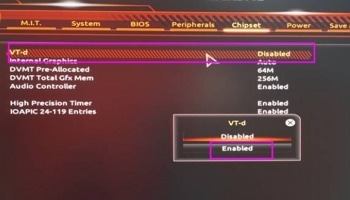
GIGABYTE VT Path
Chipset – VT-D – Enabled
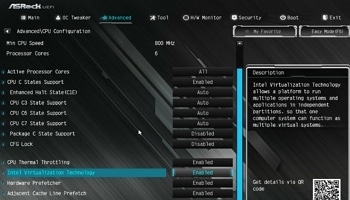
ASRock VT Path
Advanced – CPU Configration – Intel Virtualiation Technology
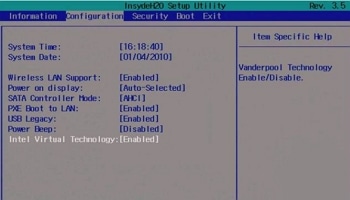
InsydeH20 VT Path
CPU Configration – Intel Virtualiation Technology
4. Check VT activation
Finally, you can complete the VT activation task by checking whether the virtualization function is being used as in item 1.
Summary
- BlueStacks can have optimal performance when VT is enabled along with optimization tasks.
- The entry shortcut key may vary depending on the motherboard, so be sure to check before entering BIOS.