Explore the Adobe Photoshop Interface workspace
Understanding work area settings in Photoshop’s interface
Get to know the Photoshop interface workspace
In the last episode, we learned about Photoshop Korean-English conversion, which is a basic thing you need to know when using Photoshop. As there are many lectures in English, there are many cases in which you need to switch to the English version of Photoshop. Now, before we get into the Photoshop lecture in earnest, let’s take a look at the overall interface. In particular, Photoshop requires different tools for image work, so it is a good idea to start by familiarizing yourself with the interface and setting the settings that are right for you.
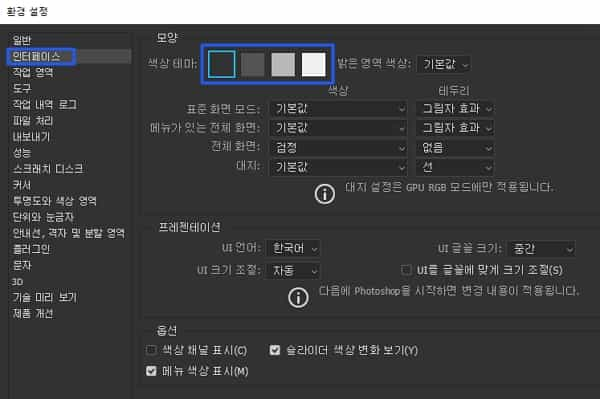
1. Interface settings
Interface Settings allows you to select various options for Photoshop’s interface. Various settings are possible, including the basic interface color theme, screen mode, and full screen settings. Adjust the interface to your desired settings.

2. Set up workspace
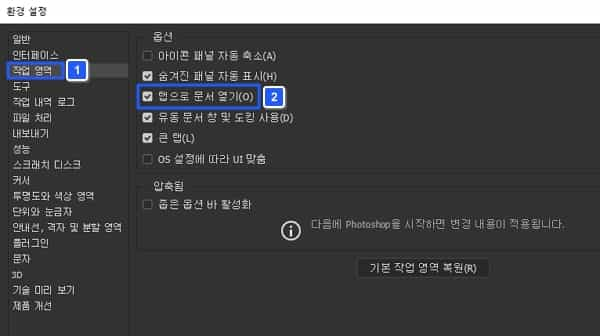
In fact, the work area can be said to be the most important part of the interface course. The work area is a space designated by the user to set up to make it easier to open images.
You can use the workspace more conveniently by setting up to open documents with tabs in the workspace as shown in the image. Let’s look at the following image as a representative example.

3. Example of work area settings
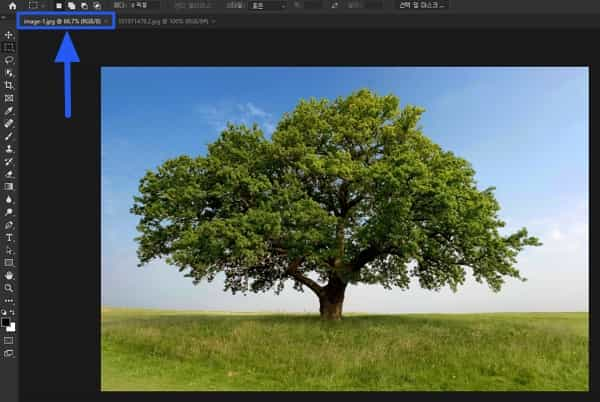
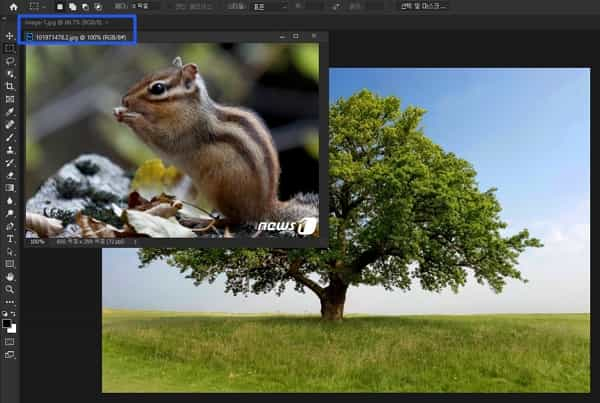
First, this is the image loaded by default. This shows that work can be done in one work area. If you select Open tasks as tabs on this screen, you will be able to load images as tabs, as shown in the following image.

This setting allows you to place multiple images as tabs in one workspace. Although some users may find this inconvenient, it is one of the settings preferred by most Photoshop users. If you do the above, you can work very conveniently when working with multiple images.

Summary
- You can change the default settings of the interface.
- You can additionally load other photos from one work area.